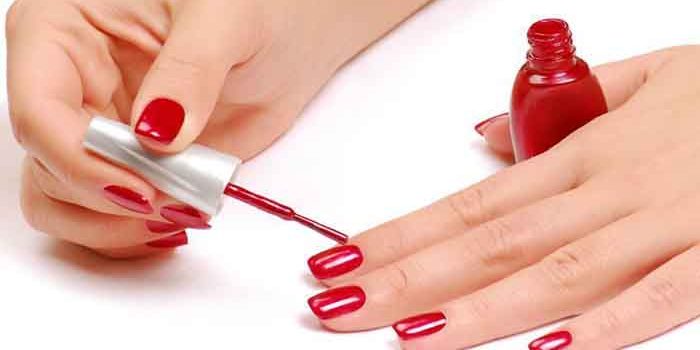
Semi-permanent varnish is the solution, if you are tired of your varnish flaking or only lasting a week. Do you want to make your own semi-permanent manicure at home, but you don’t know the steps to follow or the products to use? Don’t worry. In this article, I will tell the tips for a successful semi-permanent manicure.
The preparation of the nail is an important step that should not be neglected if you want your semi-permanent varnish to last 3 weeks. You will need:
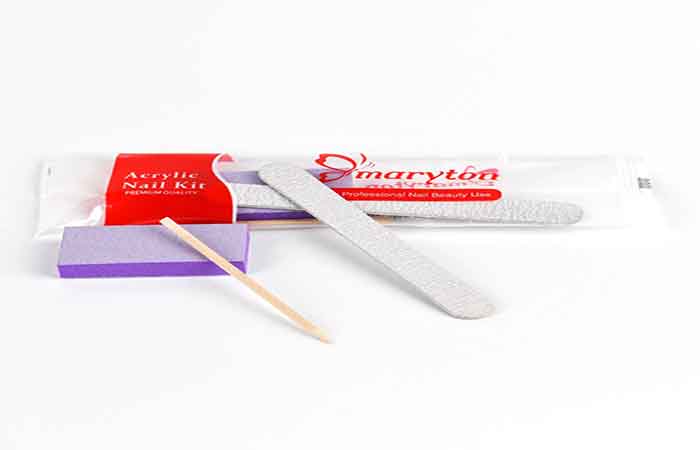
- A wooden stick that gently pushes the skin and cuticles that have covered the nail.
- A nail file that allows you to shape your nails. Oval, almond or square, the choice is yours. Always file in one direction and avoid back and forth movements.
- A polishing block is an indispensable tool. It smoothes the nails and removes streaks and dead skin around the nail.
The use of these different products will allow the semi-permanent varnish to adhere better to the nail. This is why our Maryton also designed complete kits including all the equipment necessary for an impeccable manicure!
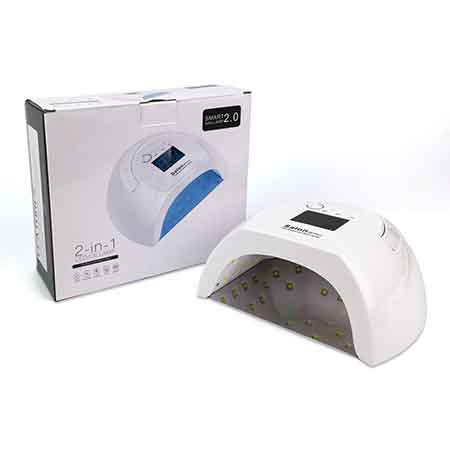
The primer is a must that allows you to dehydrate nails that tend to be greasy. If the nail is oily, the semi-permanent varnish will not hold, it will then be necessary to apply the primer so that it absorbs the humidity. Before applying the semi-permanent varnish in the color of your choice, a base coat must be applied and dried under a UV / Led lamp for 60 – 120 seconds, which can prolong the duration of your manicure and protect your nail from the colored pigment of the varnish.
To apply your varnish, apply a first thin layer then catalyze under the lamp for 60-120 seconds. A second coat is necessary to reveal the actual color of the varnish. If the color is light, a third layer can be applied to have a more opaque finish. What’s more, it is necessary to apply a top coat after applying the semi-permanent color varnish. This step prolongs the hold of the manicure and prevents the varnish from flaking.
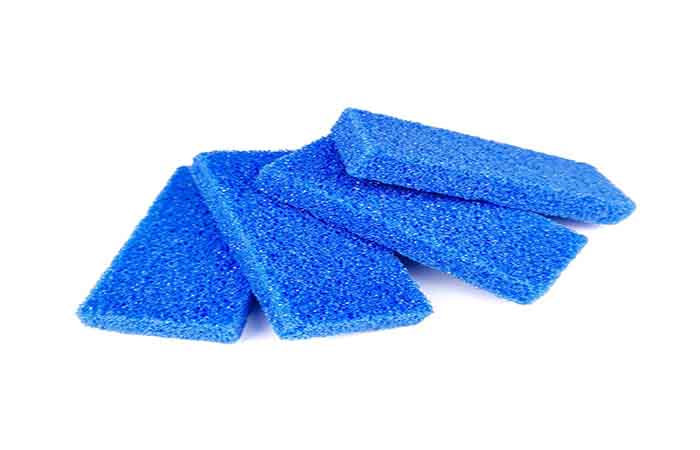
To remove the semi-permanent varnish, you will have to wrap your fingers in the remover pads for 15 minutes or wrap them in foils of acetone remover. In this case, it will then be necessary to soak a cotton ball with solvent, put it on the nail and wrap it with aluminum foil. For the acetone to permeate the varnish well, they must be left on for 15 to 30 minutes. Once the varnish has softened with acetone, remove it with a cuticle pusher stick and remove the last residues with a polishing block. Finally, use a treatment oil to rehydrate your nails.
There you have it, you have all the information on the professional manicure sets to do your semi-permanent manicure at home. Get our products on our nail supply store online and get your nails done at a low price.
Hoping to have been helpful and wish you have a good manicure!
Read also: Application of semi-permanent varnish; How to do ?

